If you’re on the hunt for the best mermaid nails ideas to take your summer nail game to the next level, you’ve landed in the perfect spot. Mermaid nails have solidified their place in the nail art universe, encapsulating the spirit of the ocean and the enchantment of the sea.
These captivating designs feature glittery mermaid tails, iridescent scales, and dreamy seashell accents, making them an ideal choice for anyone enamored with the ocean and looking to carry a piece of it on their fingertips. Regardless of your skill level, from beginner to seasoned nail artist, mermaid nails provide a flexible and imaginative avenue to showcase your style while injecting a dose of summer elegance into your appearance.
With the mermaidcore trend sweeping through the fashion world, now is the perfect time to explore these stunning and inventive nail art ideas. Ranging from simple, pastel beach-ready designs to complex, 3D seashell and holographic art, there’s a mermaid nail design suited for every taste. This article will walk you through the essential techniques, offer a step-by-step tutorial, and present some inspirational mermaid nail designs that will ensure your summer manicure is truly memorable.
Basic Techniques for Mermaid Nails
Choosing the Right Colors
When it comes to creating mermaid nails, the choice of colors is essential. To capture the essence of the ocean, you’ll want to focus on a palette that includes shades of blue, green, and purple.
These colors can range from soft pastels to vibrant and bold hues. For a more authentic look, consider using iridescent and glitter polishes that mimic the shimmering effects of the sea. Pastel colors such as pink, yellow, and teal can also add a playful and beachy vibe to your mermaid nail design.
Additionally, metallic and holographic polishes can enhance the mermaidcore theme by giving your nails a dazzling, underwater effect. Don’t forget to include neutral shades like white and clear polish to create highlights and accents that resemble sea foam or the sheen on a mermaid’s scales.
Essential Tools and Materials
To achieve professional-looking mermaid nails, you’ll need the right tools and materials. Here are some essentials to get you started:
- Nail Files and Buffers: These are necessary for shaping your nails and preparing them for polish application.
- Nail Drill: While not mandatory for every design, a nail drill can be handy for more intricate or detailed work, especially if you’re using acrylic or gel extensions.
- Nail Brushes: Invest in a set of reliable brushes for applying polish, especially if you’re working with acrylic or gel. Thinner brushes are ideal for detail work.
- Nail Stamping Plates and Stampers: These tools are perfect for creating scale patterns and other mermaid-inspired designs. Brands like MoYou and Messy Mansion offer high-quality stamping plates and stampers.
- Nail Vinyls: These can help you achieve crisp, clean lines and patterns without the need for freehand painting. They are particularly useful for beginners.
- Glitter and Holographic Polishes: These add a touch of magic to your mermaid nails. Look for polishes with iridescent flakes or holographic effects to give your nails a shimmering, underwater look.
Simple Strokes and Patterns
Creating mermaid nails doesn’t have to be complicated. Here are some simple techniques to get you started:
- Freehand Scales: If you have a steady hand, you can paint mermaid scales directly onto your nails using a small brush. Start with a base color and then add scales in a slightly lighter or darker shade. Add some glitter on top for extra sparkle.
- Stamping: Use nail stamping plates to create intricate scale patterns. Apply a base coat, stamp the design, and then seal it with a top coat. This method is quick and ensures uniformity.
- Gradient Effect: Use makeup sponges or gradient tools to blend colors and create an ombre effect that mimics the ocean’s gradient hues. This technique is easy and adds a lot of depth to your design.
By mastering these basic techniques, you’ll be well on your way to creating stunning mermaid nails that are perfect for summer.
Step-by-Step Mermaid Nails Tutorial for Beginners
Creating a Mermaid Scale Effect
To create a mermaid scale effect, you can follow a simple and effective method using nail polish and a striper brush. Here’s a step-by-step guide:
- First, prepare your nails by applying a base coat to protect them and ensure better polish adhesion. Then, paint two coats of a base color; for a mermaid theme, shades like blue, green, or purple work well. For example, you can use Dior Saint Tropez as a base color.
- Next, apply a coat of a slightly lighter or shimmery polish over the base color. Dior Perlé is a great option for this step as it adds a subtle shimmer.
- Using a striper brush and a metallic or glitter polish (such as Milani Silver Stilettos), paint smile-shaped curved lines starting from the center of your nail and moving outward. Repeat this process, alternating the starting points of each row to create a layered scale effect. Ensure each row is centered on the one above it to maintain the scale pattern.
Continue this process until you cover the entire nail surface. Once you’ve completed the scales, apply a thick, quick-drying top coat to seal the design and bring out the shimmer in the polish. Use a top coat like Seche Vite, H K Girl Top Coat, or Poshe to protect and seal your design.
Adding Accents and Details
After creating the scale effect, you can add various accents and details to enhance your mermaid nail design. Here are some ideas:
3D Shell Lines: Use a thick gel polish to create raised shell lines on your nails. Apply the gel in straight or curved lines, concentrating the product at the start of each line to create a tapered effect.
Flash cure each line to prevent them from merging together.
Glow-in-the-Dark Accents: For a unique twist, add glow-in-the-dark lines or details using special glow-in-the-dark polishes. This can be applied in patterns or as accents to give your nails an extra magical touch.
Pearls and Bling: Add pearls or nail charms to give your mermaid nails a luxurious and ocean-inspired look. These can be placed randomly or in a pattern to match your scale design.
Secure them with a top coat to ensure they stay in place.
Ombre Effect: Create an ombre effect by blending colors from dark to light, mimicking the gradient hues of the ocean. Use a makeup sponge or gradient tool to blend the colors smoothly. You can also add glitter or holographic polish on top to enhance the effect.
Chrome and Holographic Finishes: Use chrome powders or holographic nail polishes to add a shiny, reflective finish to your nails. Apply these over a base coat and seal with a top coat to make the colors pop.
By following these steps and adding these accents, you can create a stunning mermaid nail design that is perfect for summer and sure to turn heads.
Inspiring Mermaid Nail Designs for Summer

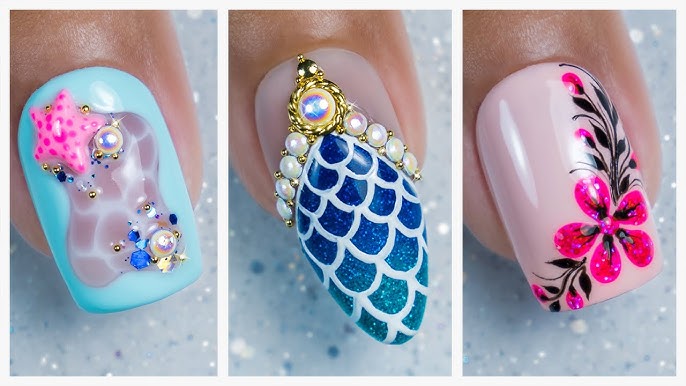
The Classic Mermaid Look
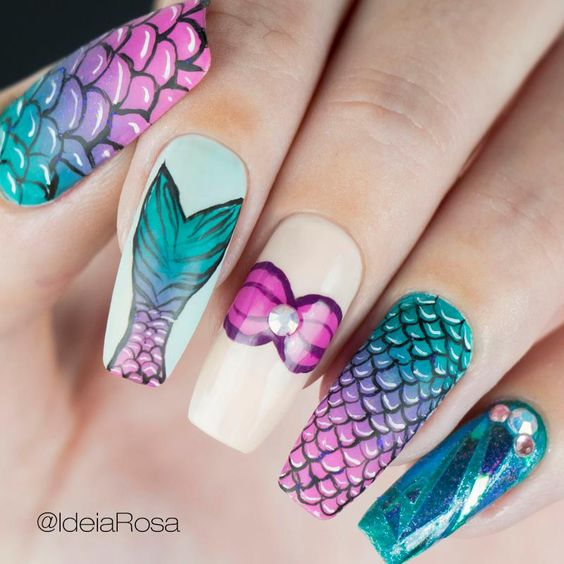
The classic mermaid look is a timeless and captivating design that embodies the essence of the ocean. This design typically features shimmering scales, iridescent hues, and aquatic accents.
To achieve this look, you can start with a base color such as a deep blue or green, and then add scales using a metallic or glitter polish. The scales can be painted freehand or created using nail stamping plates, which offer a variety of scale patterns that can be layered for a more intricate design.
For an extra touch of magic, you can add 3D shell lines or seashells using a thick gel polish. This technique involves applying the gel in straight or curved lines, concentrating the product at the start to create a tapered effect. Flash curing each line ensures they do not merge together, maintaining the raised shell effect.
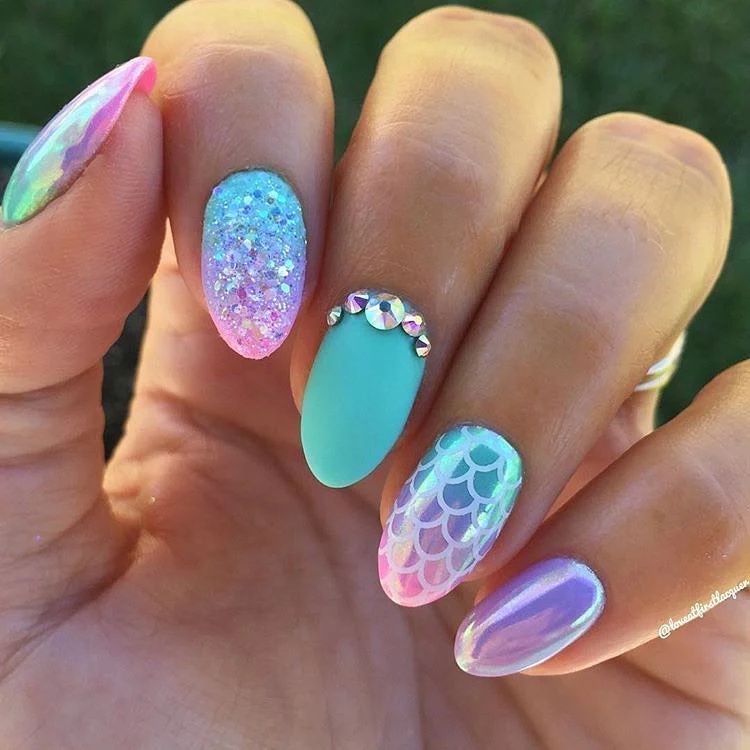
The Glittery Seafoam Design
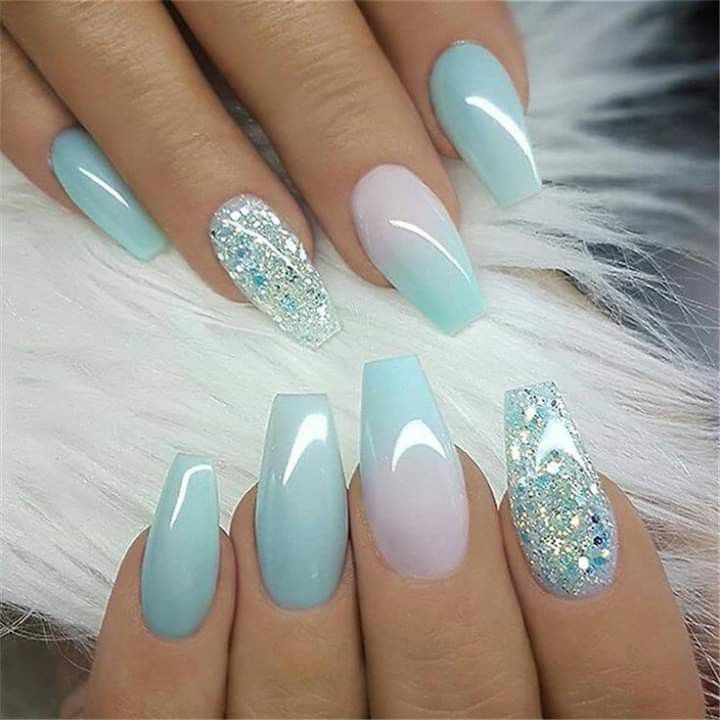
The glittery seafoam design is perfect for those who love a more playful and whimsical look. This design features soft, pastel colors reminiscent of seafoam and the gentle waves of the ocean. You can create an ombre effect using shades of blue, green, and white, blending them smoothly to mimic the gradient hues of the sea.
To add a glittery touch, use iridescent or holographic polishes that shift colors in different lights. The Deep Dive polish with iridescent green and pink jelly flakies is an excellent choice for this design, as it creates a dazzling, aquatic glam effect.
You can apply a single coat for a subtle look or build it up for a more dramatic effect.
The Elegant Mermaid French Manicure
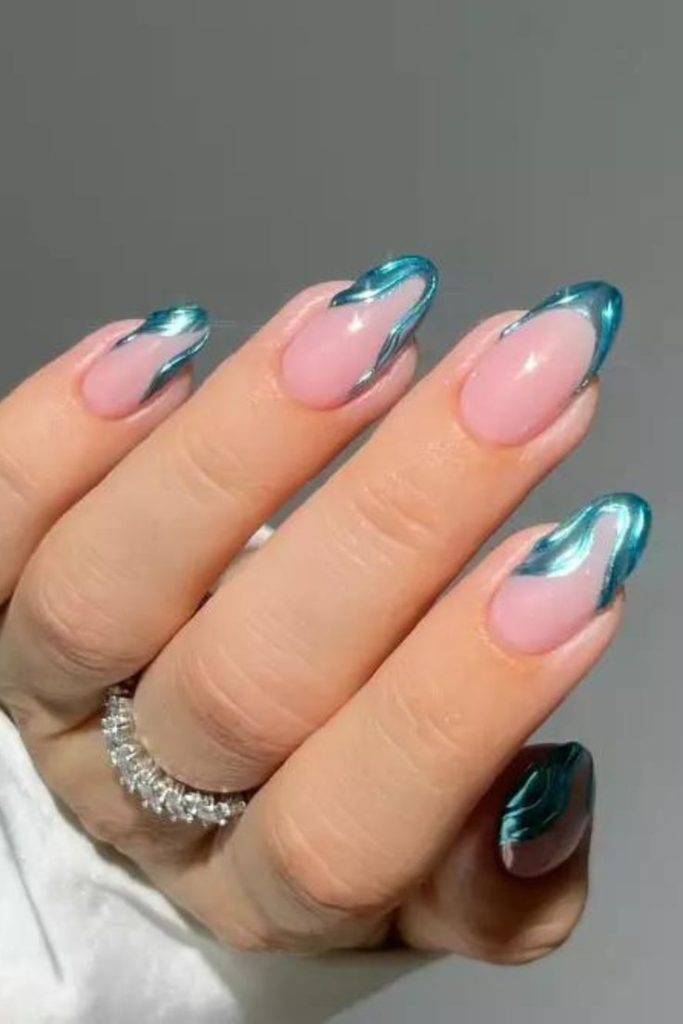
For a more sophisticated and elegant take on the mermaid theme, consider the mermaid French manicure. This design combines the classic elegance of a French manicure with the whimsical ocean vibes.
Instead of the traditional white tips, you can use shades of blue, green, or purple to create a gradient French tip effect. This can be achieved using magnetic gel polish or by hand-painting the tips with a small brush.
To enhance the design, add delicate seashell accents or 3D shell lines. For a more refined look, use pearly chrome polish to create a swirly, elegant effect that is perfect for summer weddings or other formal events. This design offers a perfect blend of sophistication and summer flair, making it ideal for anyone looking for a stylish and unique manicure.
Conclusion
In conclusion, crafting mermaid nails is an exciting and imaginative way to capture the enchantment of the sea and inject a splash of summer elegance into your style. It’s important to begin with the ideal palette, including shades of blues, greens, and purples, and to utilize indispensable tools such as nail stamping plates, glitter polishes, and UV gel for that professional touch. Essential techniques involve meticulous nail preparation, the application of base coats and colors, and the incorporation of special accents like 3D shell lines or iridescent powders.
Whether you’re drawn to a traditional mermaid aesthetic, a sparkling seafoam effect, or a sophisticated mermaid French manicure, the instructions provided here will steer you through the creation process. Don’t hesitate to experiment and tailor your design to reflect your unique sense of style.
With some dedication and patience, you’ll be able to craft exquisite mermaid nails that are ideal for any summer event. Thus, embark on your mermaid nail art journey and let your nails dazzle like the gems of the ocean!